
$25,000 Build Off: Team Bryan

Team Bryan (formerly Team Sin) is rockin the build so far. I am the marketing manager here at ipd and have taken over the reins for Sin who has moved on to explore other ventures and left ipd. I'm excited to be working with David and Katy to help their 122 become their dream car. I'm a vintage Volvo enthusiast myself and am daring enough to drive a 140 as my daily driver. We're an odd breed, us vintage Volvo drivers, but we wouldn't have it any other way.
May 1, 2013 - David and Katy's Build Off proposal
David Belovarski & Katy Fullinwider
6 months ago I bought my first vintage car: a 1967 122s with M40 and b18. $400 for sale by its original owners, I snatched it up this little pushrod as fast as I could, without being too pushy myself. It was a very dusty, faded red 4 door and had spent half of its life touring in Japan and half sinking in New Mexico sand. As soon as I saw it--dry-rotted tires, red plaid interior, and spider-covered engine--I was in love. Never before owning a Volvo older than the 1978 240 I bought 3 years ago to commute to college, I was so excited to restore this little beauty and have a unique weekend driver.
Right after I paid the retired owners' daughter for it, she proceeded to go to the store and backed up straight into my newly-acquired 1999 V70 T5M, hitting the rear quarter panel with no small amount of vigor. Needless to say, her insurance was nice enough to pay for the damages. Sacrificing cosmetic repairs on my dented wagon, I decided to use the money to start the restoration of "Arthur." That insurance check rebutted any doubts I had that this Amazon was meant for me.
The money always seems to run out quickly, though. What was left after paying off tuition and gas went to the essential parts: engine and drive train reseal kit, tires, alternator upgrade and radiator.
Months of weekends spent flushing out brakes and gas lines, tearing down the b18 and grinding valves, honing cylinder walls, sealing body rust, ordering more parts, etc finally paid off. This Monday I finally got it driving and managed a 5 mile trek around the neighbourhood with spongy brakes, sloppy suspension, and one worn-out SU carburetor. But I almost cried with joy, as men tend to do when their labour of love is on the road again after 2 decades of sinking into the New Mexico sand.
Currently these parts have been replaced:
- Wheels and Tires 15x8 Jeep "Canyon" Rims (1" Spacers on rear. Sits flush with fender flare. May change back to original chrome dome steelies, but really wanted something wider and have had these for years)
- Engine reseal (internals still in really good shape with 137K! Checked all valves and bearings to specs)
- rear main seal upgrade to neoprene rubber,
- Transmission seals replaced
- 240DL 110A Alternator (with local welding shop modifying the bracket)
- 3 core Aluminum Radiator with electric fan (adapted radiator support also by local Welding shop)
- Just sold the SUs and ordered the upgrade to Weber 32/36 DGEV single carb
- Replaced every coolant and fuel line, clutch and brake master/slave cylinder seals
- Installed LED Tachometer, want to exchange for something more vintage themed.
- New OEM Sachs clutch kit
- Crane Cams Optical ignition module kit (removed points)
- Remove fender mirrors (didn't like the look unless they're chrome)
- Replaced driveshaft center bushings
- Removed, cleaned, and flushed gas tank
- New wiper blades
- Beautiful wooden shift knob. Refinished with lacquer.
The following I would do with the help of IPD to finish the restoration:
- First things first, Replace floor panels, replace brakes (upgrade to p1800 rear disc if possible), brake lines, parking brake cable, all bushings (polyurethane where applicable). Inspect wheel bearings, upgrade suspension (sport springs, sways, shock absorbers) all in May 2013.
- June would find the car getting a reupholstered interior, Beige seats (to combat summer heat) and Black vinyl dash recover, red carpet, white headliner, red and black door panels.
- July: If all goes smoothly on interior work, the next step is to fix cosmetic issuies: cracked windshield, remove fender and hood dents (the rest of the body is good, thankfully) plug-weld holes. Remove incomplete trim and repaint the exterior, trunk, and underbody. Simultaneously replacing door and window seals. Also fixing dented bumper brackets and removing bondo over the factory seams on the front end.
- August/September would find HID Glass projector headlights (OEM look with added visibility and reliability of HID), Upgrade Valve cover to a sleeker modern style, upgrading to a power brake booster/master cylinder combination. new light lenses all around.
I anticipate that with the help of IPD I can get all of this done within this year, and more importantly, within the sponsored budget. The labor that exceeds $2500 I can do myself since I am a trained mechanic from Central New Mexico Community College's ASE program and interned at a local upholstery shop for one year. I will have no problem installing a fresh interior or upgraded parts. This way I can confidently say that with the help of IPD and summer days spent at work this Amazon will be reliably restored and on the road! At that point it would need some IPD sticker on it, perhaps on the center of the rear window?
This project has taught me in the past 6 months that owning a project car isn't about how much money you throw at it; there is no shortage of wealthy restorers in this country. It is about the dedication to work within your means and never give up, the love to spend those cold winter and hot summer days making sure things are done right, and the patience to wait for those necessary parts that can frustrate and hold you up until the next free weekend.
Although I am a working certified mechanic, I am still a full-time student/actor attending the University of New Mexico. My dream is to have Arthur restored and one day see my Volvo in a movie with my beautiful and ever-supportive girlfriend and fellow actor.
I won't argue that it is the cleanest candidate for a sponsored restoration, in regards to the floor panel rust and sun-dried interior; but you will be hard-pressed to find a more loved Volvo than my red little Amazon. This car is definitely a labour of love,and already my efforts and your customer service have got it running and driving. I am not quitting on it no matter how long it takes. I have hope that young people aren't limited to remain dreamers until their old age; and that this dream of my restored and reliable 122 will come true with your help! It deserves to see the open road again. Thank you IPD for considering my project and providing such reputable service and parts for 50 years.
Sincerely,
David Belovarski


May 3, 2013

May 14, 2013
Update! Gutted the interior, cut the floors and welded new pans. Ready for parts to come in!

May 29, 2013
Ground-up restoration, quite literally! All the prep, paint, reassembly etc kept me busy for the past 2 weeks.
When the rear bushings arrive, we'll get her back on the road!

June 11, 2013
Rear end bushings have arrived--alongside new motor mounts & master cylinder--so we got everything back together and could take her out for a drive. You'll notice the new springs actually make the car sit higher a little higher than stock, although they are shorter than the OEM springs, they're a lot stiffer. I'll have to do some shopping around for another set to get this 122 sitting lower. Also looking for new U bolt for one parking brake cable; one is missing.
Once installed (with great difficulty on certain bushings) the IPD bushings, sway bars, stainless brake lines and shocks have already made this car ride 1000% better! It got rid of clunking, squeaking, lost power, body roll, and the fear than comes with driving a car that has the original 45 year old brake lines/master cylinder. Although it is a volvo and therefore the safest candidate among its age group, I now have complete confidence it will remain on the road for another 50 years.
I skipped over the detailed look at suspension and rear sway bar because I'm going to make a separate HOW-TO for those, since they required modification, so look forward to that and exciting new developments. Who knows what will surprises will show up next?
Thanks for watching. Feel free to ask questions, rate, comment and subscribe for bi-weekly updates!

June 25, 2013
Overview of the coilover setup on the Amazon. I lowered the rear 2 inches by putting shorter springs, and the front will be lowered next time you see it. I will just remove the threaded sleeve and adjusters on the front to drop it another 2 inches. I may end up lowering the rear another inch...I love low cars.

July 16, 2013
Overview of the IPD sway bar rear installation for the Amazon & P1800 models. There is some modification, so this video will help you visualize a lot of the tricky parts you may encounter. I have the large sway bar on my 242T, so I know the cornering powers of IPD bars. Pretty surprised that this car didn't come with an OEM bar.

July 30, 2013
The front's been lowered 1.5 inches, I fit some new seats in and took a shot at refitting the front bumper after straightening out the brackets. I'm really digging the new changes.


September 10, 2013
How to remove the engine in a Volvo Amazon/122s. It's easier than you might think!
If there's anything I left out that you would like to have more information on, please comment on our youtube channel:
https://www.youtube.com/watch?v=kGp1N3b3lFg

September 30, 2013
We sanded the car down to bare metal with 40 grit sandpaper using a Random Orbital sander first. That took a long time, and lots of vibrations on the hands (doesn't feel too good after several hours). We instead found better results using 40 grit ceramic flap disc used for stripping paint fast with our angle grinder. A 7" wheel would have been better. If you don't move fast, it will start leaving grinding marks on the body. With the amount of waves on the hood, roof and trunk it didn't really matter so much, since our body shop said they'd "skin" the whole car with Bondo to get the showroom finish. You could argue that prep is more important than paint in the overall look of a car. While the car is at the body shop, we are getting to work on the engine and picked up some sweet mystery wheels. Can you guess what they are?

October 15, 2013
This time we are going over the removal of the trim, door handles windshield, windows, rear glass, lights, rubber seals, grille and wipers. The rear reflectors that I got in Colorado are going to be sold, so let me know if you need any. Car is still in the paint shop. They're having some family-related delays, so hopefully it will be out at the end of the month.

November 1, 2013
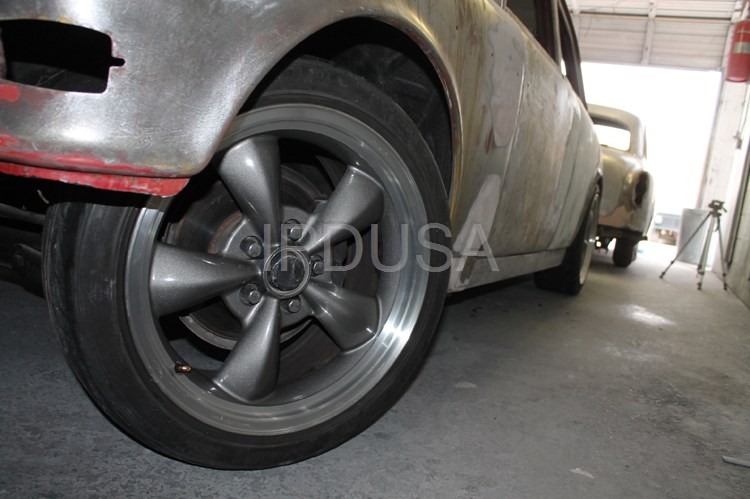
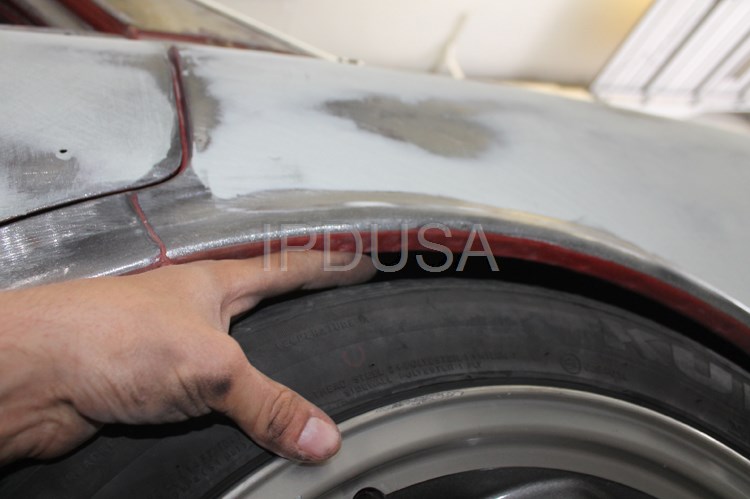
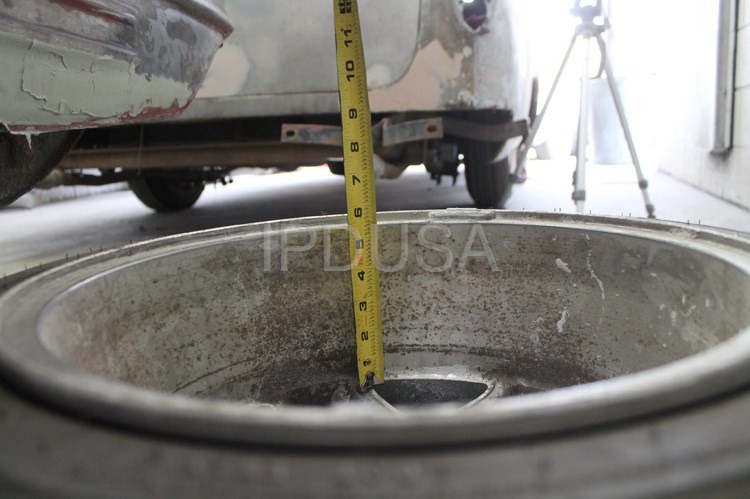
Ever wonder how big of an aftermarket rim you can fit in your Vintage Volvo 122 Amazon? Does your blower motor not work? I took a lot of measurements to see just what was needed to run larger rims and tires by offset, backspacing, and tire size; and explored why my blower motor wouldn't blow! Once you have the blower motor out (probably the easiest removal ever on these cars) it's easy to see how the bearings are stuck up with old grease and dust over the years. Nothing some WD-40 won't fix! In the rear, any rim with a backspacing greater than 5" needs some sort of spacer to clear the rear spring perch.
The front issues include increased turning radius (larger rim rubbing sway bar of tie rod end before going full-lock) and caliper interference. Also, to measure how much the front half will come out, subtract backspacing from overall width. About 4" in this case. This video is picture heavy so that instead of you having to rewind and listen to the information repeatedly, you have it in slides and can just pause the video and write it down.
This blog was helpful in getting some precise offset/spacing numbers for the 17x8 Mustang Bullitt rims I put on my 122 Amazon:
https://forums.vintage-mustang.com/mod-custom-forum/534657-bullitt-wheels-ones.html

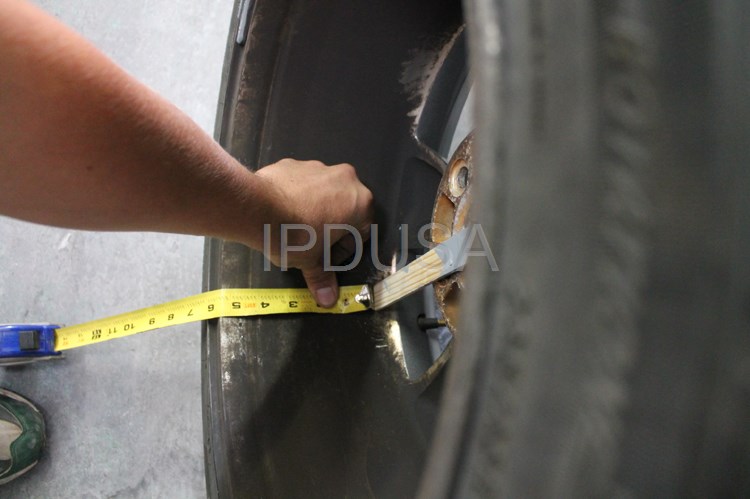
This is Jeep "Canyon" rim 5.5" back spacing. Front spacing was 4", same as the Bullitt rims.
Bullitt 5.72" back spacing. Fits a little tighter with the 1" spacer, but still ample clearance room.
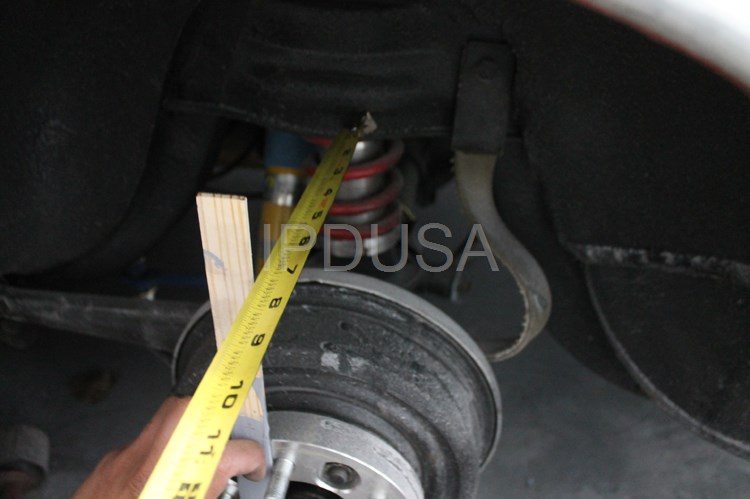
Approximately 7.25" clearance from edge of spring perch to spaced hub surface.
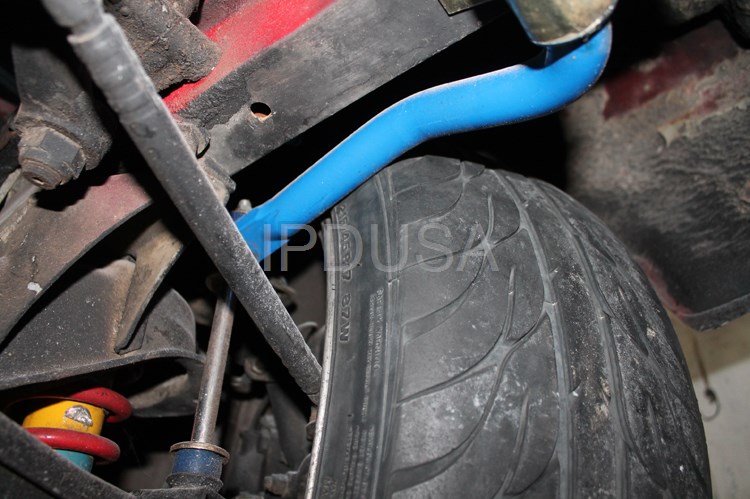
Underneath view of space between Bullitt lip and perch lip. just under 1". Can't go less than that without issues.
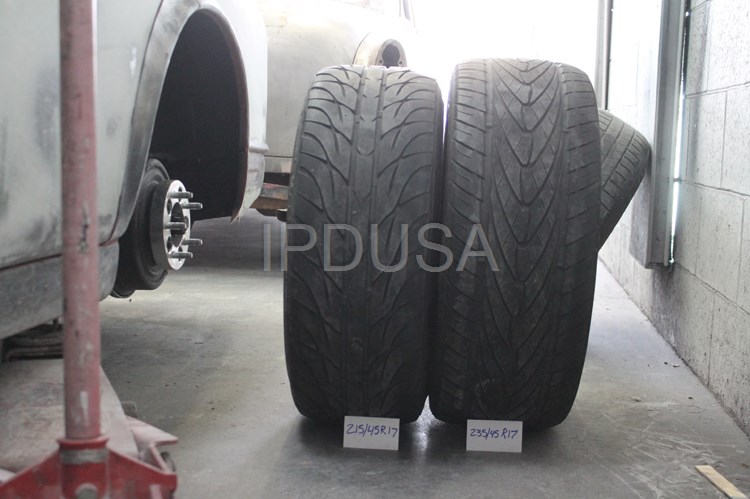
This is with the 235/45 tire. Very little clearance. The 215/45 helped open that up. But the lip on the rim is still really close to the fender lip. Thus, fenders will be professionally rolled and pulled while the car is at the body shop.
The lower profile made a 1" difference in height, but still lifter the car a little bit more than the 15" tires on the Jeep wheels (195/65 I believe) and helped clear sidewall to fender more.
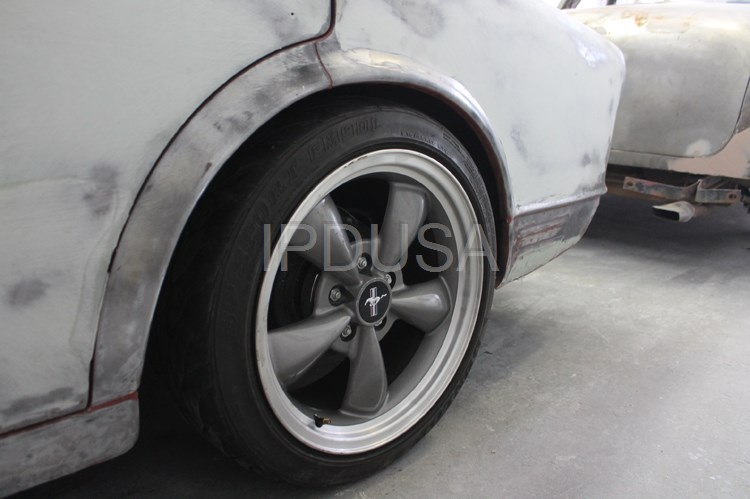
Here is the 215/45 on the rear. Looks great!
1.75 turns from straight in either direction will start to rub the sway bar. Putting 1" spacers on the front will not only help give us a better turning radius, it will also minimize, if not remove rubbing on sway bar or tie rod end/steering linkage, and match the rear. Currently it looks sunken in. Ride height is higher in the front because our engine is still out.
Here is full steering lock


November 19, 2013
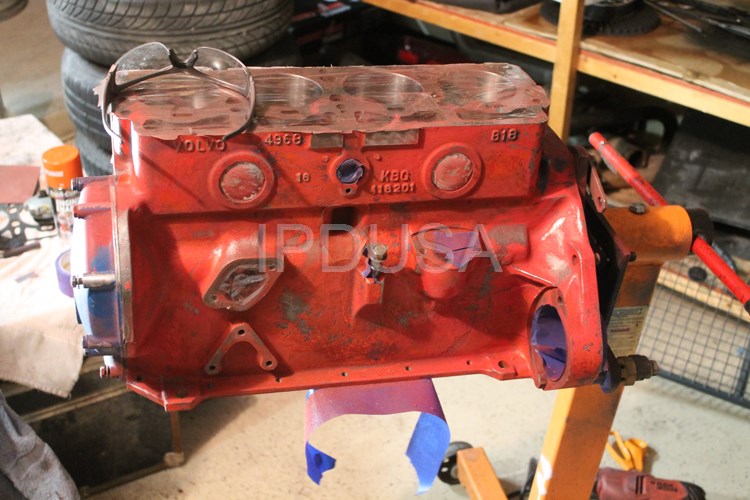
This time we did a compression test on our B18 after doing a valve adjustment. We got low numbers (about half of those of a healthy engine) so something was wrong with our internals. We tore apart the engine to find that our top compression rings in each piston were broken, or worse. Sent the engine to a machine shop right away, and now we are waiting for the car and engine to be finished with these shops so we can get it all back together. Also put 1.25" spacers in the rear once our fenders were rolled and pulled. Now we are running a staggered tire setup: 235/45R17 rear and 215/45R17 front.

December 10, 2013
Is it just me, or are my videos getting longer every week?
Still waiting for the car to be painted, I got a mockup of the exhaust pieces together to prepare everything for reinstallation once the car is back, if that ever happens... Looks like we'll be working well into January, unfortunately, at the rate this shop is working.
The exhaust is 2.25" ID from the headers out. I am going to record the audio of the open downpipe to compare the sound with the Cherry Bomb glasspack added, then with the Turbo muffler added. Finally a recording of the Turbo muffler only. This way I will have some noise options and be able to hear just how well the Turbo works for the price.
All the engine parts are at the machine shop, and next update you will see the engine getting put back together as an (almost) brand new setup. Everything reconditioned, ground, bored, replaced. It's going to be a bit of good news for a change.

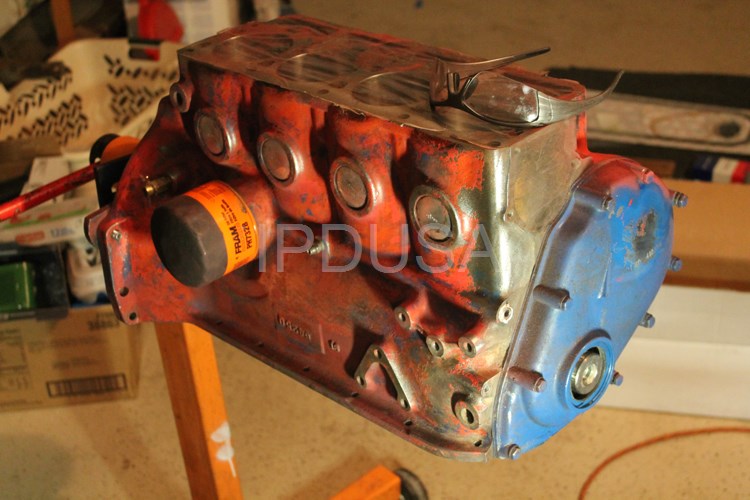
December 24, 2013
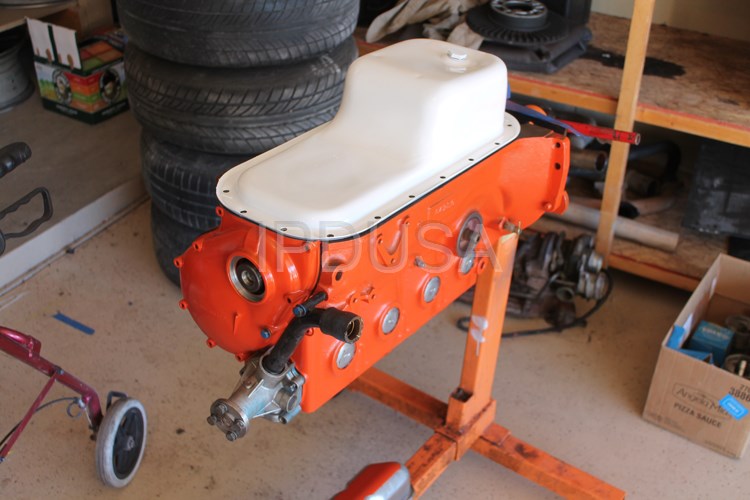
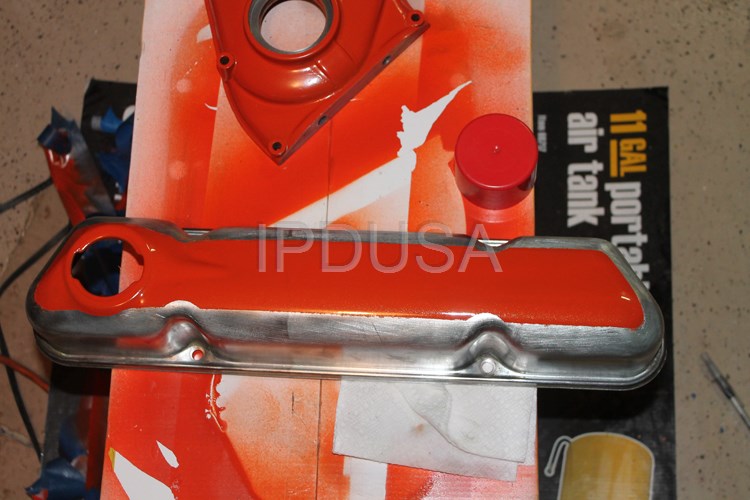
The engine, being completely rebuilt and reconditioned with new bearings on everything and +.040 pistons, looks good as new..! (not so much on the outside, but we'll alleviate that right away!). Prep is everything. I would have this all back together now if I wasn't taking the time to do it right, rather than kicking myself when I have to do it over (as is the case now, since I had to sand through my blue paint job I applied before the Build Off). I chose 'Chrysler Hemi Orange' engine paint because I am an envious fanatic of the California Special 242. If you haven't seen its Orange/White interior, do look it up.When I find material in that same pattern I would gladly use it in the Amazon. And it works well with my continuing trend of being one-off original; everyone has a red redblock. This is the little engine that wished it was a hemi. Merry Christmas from Katy, te Bellos and myself, and we'll give you some video fun right after you wake up from your Christmas dinner comas!
December 30, 2014
In this video I show you how to install the rear main neoprene seal (very handy for 240s and other newer cars), show pictures from the rebuilding of the B18, prepping and painting the engine, and reassembly with all new IPD/OEM parts and the 9 1/2 hours I spent sanding the doors and jambs to perfection yesterday and Thursday.
Next time we'll (hopefully...) have the car back from paint, and I'll paint and wrap the headers. See you in the new year!

January 20, 2014
Using a 50 ft roll of DEI Titanium Exhaust Wrap I covered my freshly sandblasted and painted headers. I also picked up a spare running B18 in town for a great price. I'm going to start bringing a baseball bat and a wookie named "Persuader" to the engine shop to make them finish painting my car finally! If anyone needs a working automatic transmission, let me know.

February 10, 2014
As we wrap up the Build Off, we give you an update on where the progress of our build is, and ask for some help getting the few final things together needed before we make our way cross country in Arthur to the IPD Garage Sale, May 17!

March 19, 2014
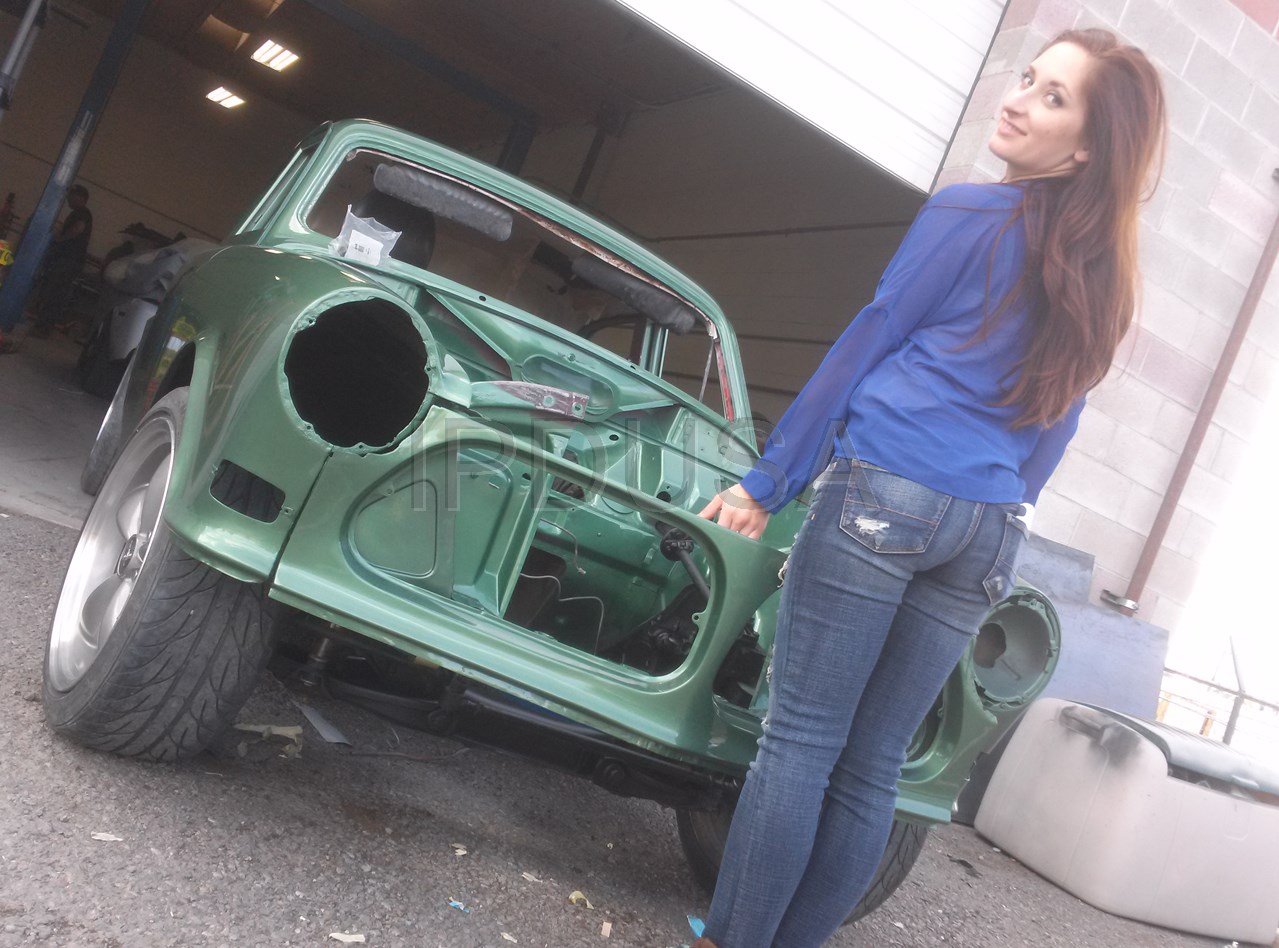
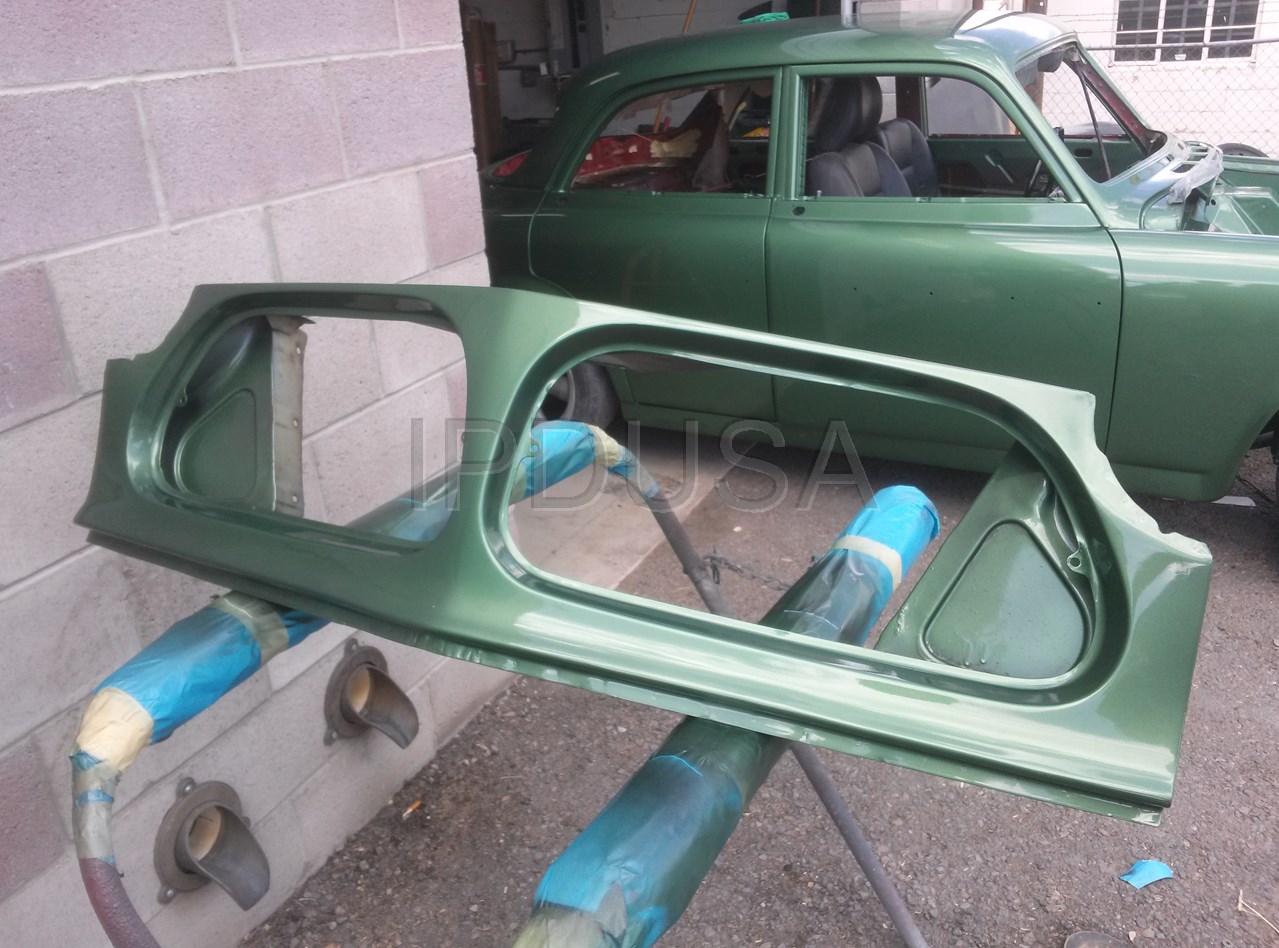
Just had the Vintage Volvo repainted at Superior Customs in Albuquerque. Great work, and awesome team. I'm very happy and eager to get back to work on Arthur again after this spring break. This color was originally going to be akin to Porsche Malachite Green Metallic, but we found something that pops just a little bit more.

April 1, 2014
o our eyes deceive us?!? Nope. That there is some fresh paint on David's 122 and we couldn't be happier for him. Congrats! It's one step closer to rulling the roads.
April 22, 2014
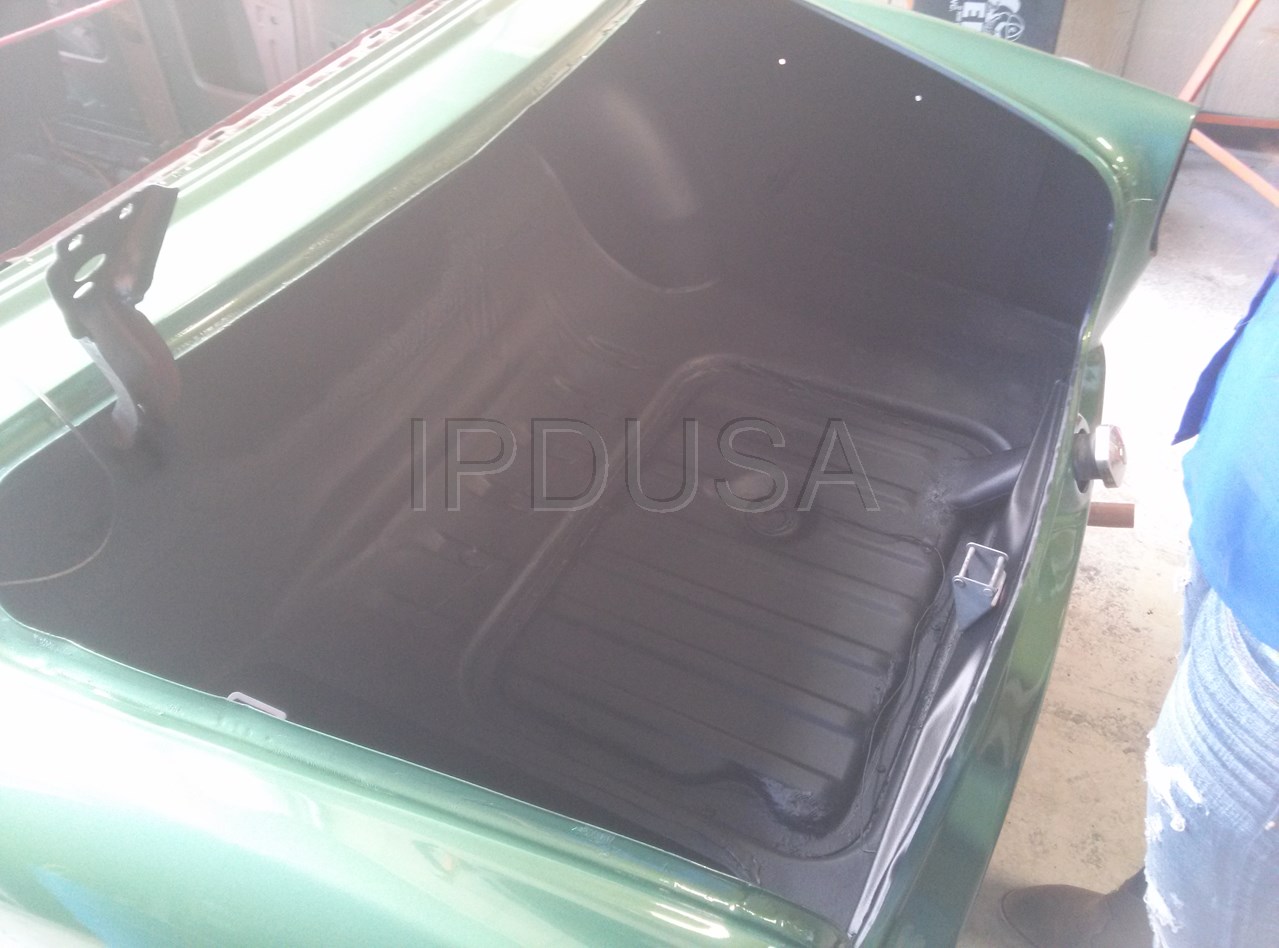
Reassembling Arthur with all new parts from the bare bones up. The secret to keeping sanity is to start seeing it more as a work of art and a labor of love than to reduce it to just being a project or object. A couple finishing touches to the engine and about 20 hours each weekend are spent in strict attention to detail. In this video you'll also see us cleaning the chrome up, routing wiring, installing power booster brakes, applying sound deadening, installing a brand new gas tank from Tanks Inc., and much more. It feels like I've only made a dent in my extensive to do list for the assembly. Even seemingly simple things, like installing a new door seal, can take upwards of 20 minutes, and it all adds up to hours of little steps to keep God in the details.

May 28, 2014
Get ready, this is a long one. This video covers the busiest part of the restoration in the shortest amount of time allowed on our 1967 Volvo 122s Amazon:
- Changing the door locks
- Battery Relocation to the Trunk
- Installing trim on the doors
- The first start on our rebuilt B18 engine!
- Installing the rear glass window and roping in the gasket
- Making the custom sunpro gauge pod with Voltage, Oil presssure, fuel level and temperature
- Installing the dashboard, wiring and steering wheel
- and putting the fenders, hood and nose piece back on.
Next time we'll show you our road trip to Portland, OR to visit IPD and pick up a special surprise!

July 2, 2014
Come along for the shaky and fun ride as we trek through 7 states and 11 borders to start off our summer with our (mostly) restored 122s Amazon! We go to the IPD 2014 Garage Sale, PDX area, pick up a special something in Washington, parts in Southern oregon, Swedish Motors in Boulder and Volvo Specialists in Denver.
